



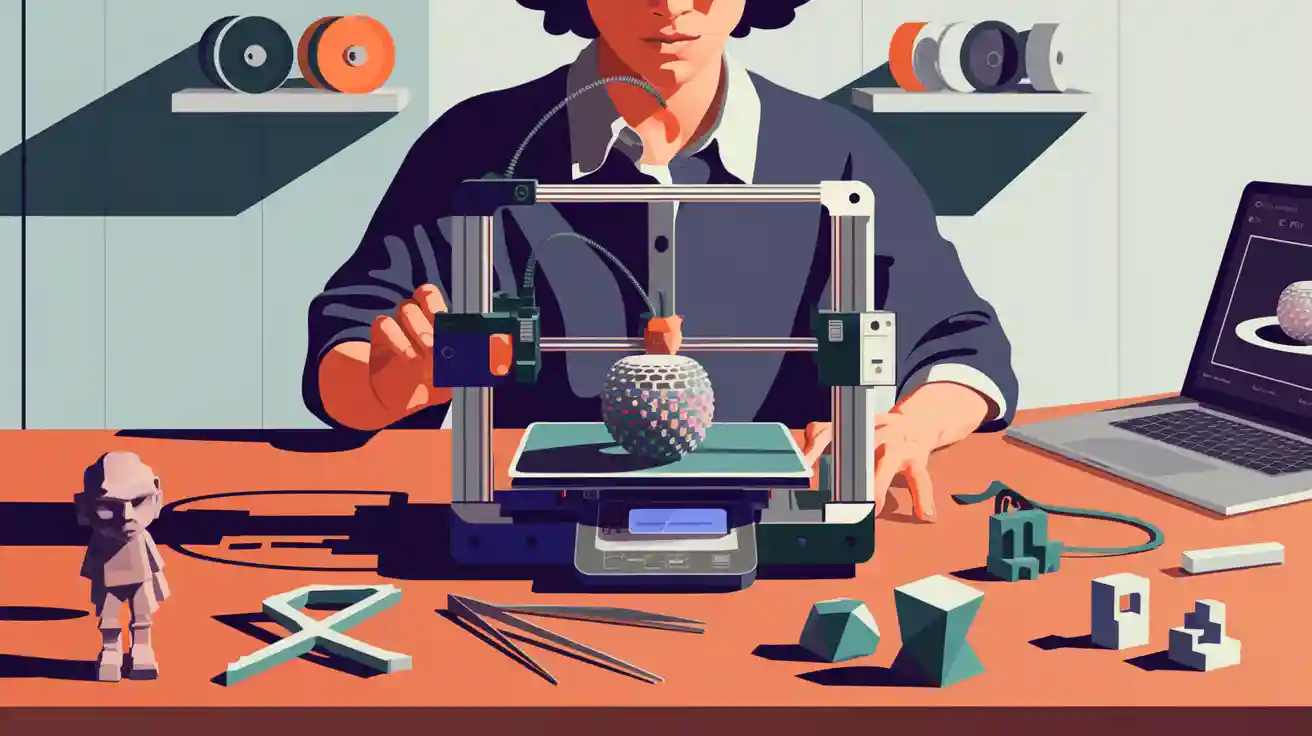
You start your 3d printing journey by preparing a 3D design file, usually in STL format. You set up your 3d printer, calibrate it, and send your model for printing. The excitement grows as you watch your design take shape.
Here are some reasons why 3d printing has become popular among beginners:
- The average price of a 3d printer has dropped dramatically, making it affordable.
- Print speed, accuracy, and material options keep improving.
- Maker communities and DIY culture spark more interest.
- You achieve great results by following simple tips and learning the basics before you begin.
Key Takeaways
- Start your 3D printing journey by preparing a design file in STL format and setting up your printer correctly.
- Choose the right filament for your project; PLA is great for beginners due to its ease of use and reliability.
- Calibrate your printer before the first print to ensure the nozzle height and bed level are correct for better print quality.
- Monitor your print throughout the process to catch issues early and ensure consistent quality.
- Regular maintenance of your 3D printer, including cleaning and calibration, extends its lifespan and improves print reliability.
3d Printing Basics
Understanding 3d printing basics gives you a strong foundation before you start your first project. You learn how the technology works, which types of machines suit your needs, and how to select the right materials for your application. This knowledge helps you avoid common mistakes and improves your results.
What is a 3d Printer
A 3d printer is a device that creates physical objects from digital models using additive manufacturing. You build objects layer by layer, which allows for complex shapes and rapid prototyping. Most beginners choose FDM (Fused Deposition Modeling) printers because they are affordable and easy to set up. SLA (Stereolithography) printers offer higher detail but cost more and require extra care.
The most common types of 3d printers for beginners:
- FDM: Low cost, easy setup, widely available.
- SLA: High detail, suitable for intricate designs.
- FDM printers dominate the home market due to their accessibility and price. SLA printers serve professionals who need precise results.
How 3d Printing Works
You start with a digital 3d model, usually designed in CAD software. The process follows these steps:
- Design your 3d model.
- Export and prepare the file.
- Slice the model into layers.
- Set up your 3d printer.
- Print the part.
- Post-process the object.
- Inspect and use your creation.
This workflow answers the question: how does 3d printing work? You use it for rapid prototyping, custom parts, and creative applications. Additive manufacturing lets you produce objects quickly and efficiently.
Materials and Filaments
Choosing the right filament is essential for successful 3d printing. Beginners often start with PLA or PETG because they are easy to use and reliable. The table below compares popular filament types, their properties, and tips for best results:
|
Filament Type |
Recommended Level |
Strength (MPa) |
Durability |
Key Properties |
Usage Scenarios |
Tips for Success |
|---|---|---|---|---|---|---|
|
PLA |
Beginner |
60 |
Moderate |
Easy to use, low temp, biodegradable |
Prototyping, toys, models |
Keep cool, store dry |
|
PETG |
Beginner |
50 |
High |
Durable, water-resistant, less warping |
Mechanical parts, containers |
Use heated bed, print slowly |
|
TPU |
Advanced |
30 |
Very High |
Flexible, durable |
Wearables, phone cases |
Direct-drive extruder, print slowly |
|
rPLA |
Beginner |
55 |
Moderate |
Eco-friendly, easy to use |
Sustainable prototyping |
Store dry, follow settings |
|
rPET |
Beginner |
48 |
High |
Sustainable, high performance |
Functional prototypes |
Store dry, follow settings |
You select PLA for simple models and rapid prototyping. PETG works well for durable parts and outdoor applications. TPU suits flexible objects. rPLA and rPET offer eco-friendly options for sustainable projects.
Tip: Always match your filament choice to your project's requirements. Consider strength, durability, and environmental impact.
Setting Up Your How to use 3d printer

A successful 3d printing experience starts with careful setup. You lay the foundation for reliable prints and long-term machine health by following each step with attention to detail. Understanding why each part of the process matters helps you avoid common pitfalls and ensures your 3d printer operates safely and efficiently.
Unboxing and Assembly
When you unbox your 3d printer, you begin a process that determines the quality and safety of every print. Manufacturers design packaging to protect sensitive components, but you must inspect each part for damage or missing pieces. You assemble the frame, attach the print head, and connect wiring according to the manual. This step is crucial because improper assembly can lead to operational failures or even safety hazards.
Tip: Take photos during each stage of assembly. These images help you troubleshoot or reassemble your printer in the future.
You should check all wiring connections before powering on the device. Wiring and electronics failures are among the most common issues reported by new users. Poor wiring can cause long-term operational problems, so you must follow best practices and double-check every connection.
Platform and Safety Checks
Before you start printing, you need to perform platform and safety checks. These checks protect both you and your equipment. Many new users overlook these steps, but skipping them can lead to fire hazards, toxic fume exposure, or mechanical injuries.
Key safety considerations include:
Fire hazards: Thermal runaway can cause fires if left unchecked.
Toxic fumes: 3d printers emit volatile organic compounds (VOCs) and ultrafine particles (UFPs).
Mechanical injuries: Moving parts and high temperatures pose risks.
Electrical hazards: Faulty wiring can lead to overheating or accidents.
You should always ensure proper ventilation in your workspace to reduce fume exposure. Use protective gear such as safety glasses and gloves, especially when handling resin or heated components. Keep a fire extinguisher nearby and never leave your printer unattended during operation.
Common platform check failures:
Printer operates, but nothing prints.
- Nozzle sits too close to the print bed.
- Over-extrusion causes messy prints.
- Incomplete or messy infill.
- Warping of printed objects.
You prevent these issues by checking the bed level, inspecting wiring, and confirming all settings before starting a print.
Initial Calibration
Calibration is the most critical step before your first print. You ensure the print bed is level and the nozzle sits at the correct distance from the surface. Proper calibration directly impacts the quality of the first layer, which determines the overall success of your print.
Initial calibration guarantees accurate bed leveling and nozzle adjustment.
The first layer's quality affects adhesion and print reliability.
If the nozzle is too close or too far from the bed, you risk severe print failures or poor quality.
You can find many calibration tutorials online, but always refer to your printer's manual for specific instructions. Take your time with this step. Rushing calibration leads to frustration and wasted material. When you calibrate correctly, you set yourself up for consistent, high-quality results.
Note: Calibration is not a one-time task. You should check and adjust settings regularly, especially after moving or upgrading your printer.
Preparing Your 3d Model
Before you start printing, you need to prepare your 3d model correctly. This step ensures your printer understands your design and produces accurate results. You make important decisions about file formats, slicing software, and how to send your file to the printer. Each choice affects the quality and reliability of your final print.
Design File Formats (STL)
You must select the right file format for your 3d design for 3d printing. The most common format is STL, which works well for basic shapes and is supported by almost every 3d printer. If you want to include colors or textures, you might use OBJ or AMF. Professional users often choose 3MF for its compact size and advanced features. The table below compares popular file formats and their compatibility:
|
File Format |
Features |
Compatibility |
|---|---|---|
|
STL |
Simple and effective for basic shapes |
Widely supported by most 3D printers |
|
OBJ |
Supports color, texture, and material details |
Ideal for detailed models and visualizations |
|
AMF |
Handles complex details like materials/colors |
Compatibility varies, but gaining support |
|
3MF |
Compact, includes materials and instructions |
Increasingly supported in professional settings |
You choose the format based on your project's needs. STL remains the best choice for most beginners because of its simplicity and broad support.
Slicing Software
You need slicing software to convert your 3d model into instructions your printer can follow. Cura stands out as a top choice for beginners. It offers a user-friendly interface, a balance of basic and advanced features, and regular updates. You can also add plugins for extra functions. The table below highlights why Cura is so popular:
|
Feature |
Description |
|---|---|
|
User-friendly interface |
Cura provides an intuitive layout that is easy for beginners to navigate. |
|
Extensive features |
It includes both basic and advanced options, allowing users to customize their prints. |
|
Regular updates |
Continuous improvements and new features keep the software relevant and efficient. |
|
Marketplace for plugins |
Offers additional functionalities like OctoPrint Integration and Post-Processing Scripts. |
|
Balance of ease and control |
Users can adjust settings like layer height and print speed without feeling overwhelmed. |
You benefit from Cura's flexibility and support, which helps you avoid common mistakes and improve print quality.
Sending File to Printer
When you send your file to the printer, you must check for common issues that can cause print failures. Problems like incorrect file resolution, thin walls, or overlapping triangles can ruin your print. You avoid frustration by reviewing your model for these issues:
- Incorrect file resolution can lead to loss of detail or overload the printer.
- Thin walls may cause warping or unprintable parts.
- Overlapping triangles complicate the printing process.
- Inverted normals confuse the printer, especially in hollow designs.
- Noise shells slow down the printing process.
- Gaps in a mesh prevent proper printing.
- Bad edges confuse the printer when more than two shapes share an edge.
You check your model for these problems before printing. This step saves you time and material, and it increases your chances of a successful 3d print.
Printing Process
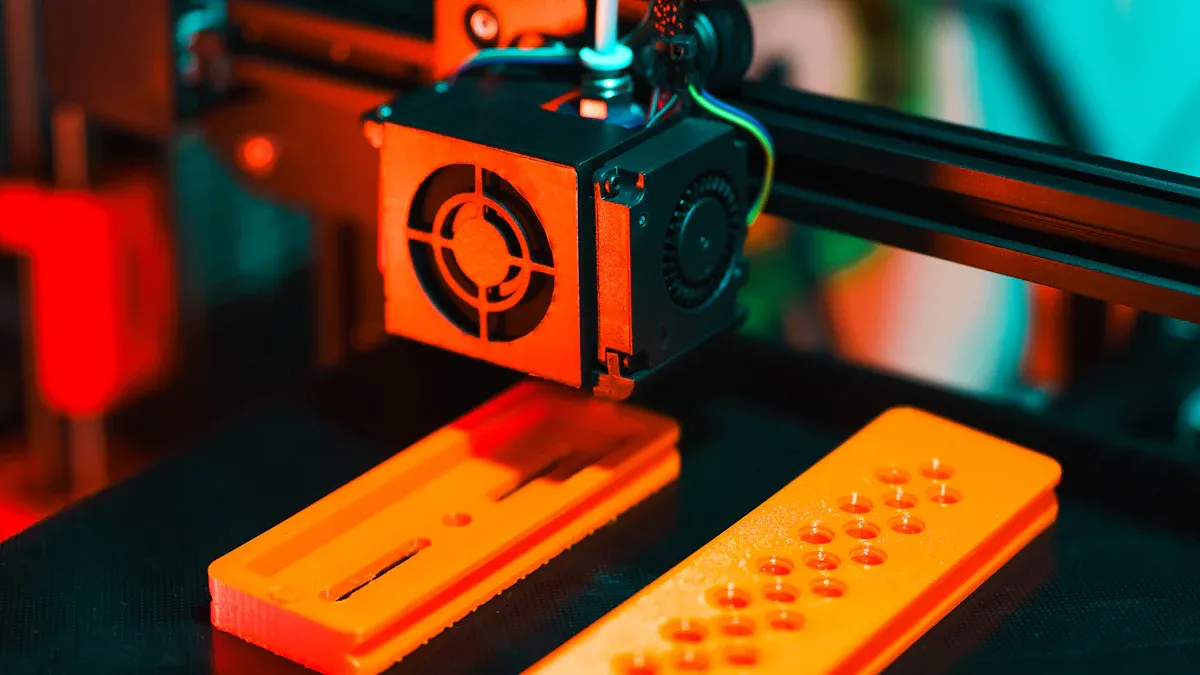
The printing process transforms your digital design into a tangible object. You experience the core of additive manufacturing as you load the filament, start the print, and monitor progress. This stage showcases the unique advantages of 3d printing, such as rapid prototyping and the ability to create complex geometries that traditional manufacturing cannot achieve. Whether you work in education, engineering, or creative arts, you benefit from the flexibility and speed that 3d printers offer.
Load Filament
You begin by loading the filament into your 3d printer. This step is crucial because the filament serves as the raw material for your object. Most desktop printers use spools of PLA or PETG, which you feed into the extruder. You preheat the nozzle to the recommended temperature for your chosen material. Once the nozzle reaches the correct temperature, you insert the filament until you see a steady flow from the nozzle.
Tip: Always trim the end of the filament at an angle before loading. This helps prevent jams and ensures smooth feeding.
You may encounter resistance if the filament is not straight or if debris blocks the extruder. In such cases, gently retract the filament and inspect the path. For advanced users, flexible filaments like TPU require slower speeds and direct-drive extruders. You can experiment with different materials to match your application, from prototyping mechanical parts to producing wearable devices.
Start 3d Printing
After loading the filament, you start the 3d printing process. You select your prepared file on the printer's interface or through connected software. The printer heats the bed and nozzle to the specified temperatures. You watch as the printer lays down the first layer, which is critical for successful prints.
Many users choose 3d printing for rapid prototyping because it allows you to iterate designs quickly. In contrast, traditional manufacturing often requires expensive molds and long lead times. You can produce custom parts for robotics, educational models, or artistic sculptures with minimal setup.
However, you must remain vigilant during the initial stages. The most frequent errors at the start of a print job include:
- First layer not sticking: The print may detach from the bed, causing the process to fail.
- Extruder blobs: If the first layer detaches, the extruder continues to deposit material, creating disruptive blobs.
- Layer shifting: Misalignment of layers occurs due to improper movement of the printer's axes.
You can prevent these issues by ensuring proper bed leveling, correct nozzle height, and clean surfaces. If you notice any problems, pause the print and make adjustments before continuing.
Monitor Print
You must monitor the print throughout the process to ensure consistent quality. While 3d printers can run unattended, regular checks help you catch problems early. Monitoring filament tension is essential because improper tension can lead to jams or under-extrusion. Many modern printers include filament tension sensors, which enhance reliability and reduce the risk of failed prints.
You should check the print at key intervals:
At the start, confirm the first layer adheres well.
During the print, observe for signs of warping, stringing, or layer misalignment.
Near completion, inspect for surface defects or incomplete sections.
Note: Regular checks help you mitigate issues related to filament tension and print quality.
You gain significant advantages by monitoring your print. Unlike traditional manufacturing, where errors may go unnoticed until the final product, additive manufacturing allows you to intervene and correct problems in real time. This capability saves time, reduces material waste, and increases your success rate.
Practical usage scenarios highlight the value of 3d printing for different user groups. Educators can produce custom teaching aids overnight. Engineers can test functional prototypes within hours. Hobbyists can create personalized gifts or replacement parts on demand. These applications demonstrate why 3d printing continues to revolutionize rapid prototyping and small-batch production.
Post-Print Tips
Remove Print Safely
You need to remove your finished print from the build platform with care to avoid damaging both the object and the printer. The safest methods involve patience and precision.
Wait for the print bed to cool down before you attempt removal.
Hold the print with one hand and gently push or pull it away from the surface with the other.
Use a suitable tool with a thin, flat edge, such as a putty knife. Position the tool parallel to the bed, tap the edge to create a gap, then slide and lift gently.
Work your way around the print, using the tap and lift technique. Avoid applying too much force, which can crack the print or scratch the bed.
These steps help you maintain the integrity of your prints and extend the life of your build surface.
Cleaning and Finishing
Post-processing improves the appearance and function of your 3d printed objects. You have several effective techniques at your disposal:
- Sanding: Start with coarse grit and move to finer grits for a polished look.
- Vapor smoothing: Use a solvent to melt the surface, creating a shiny finish and sealing pores.
- Epoxy coating: Apply epoxy for an airtight seal and increased resistance to chemicals and heat.
- Bead blasting: Smooth hard-to-reach areas and achieve a matte finish.
- Ultrasonic cleaning: Use ultrasound waves to clean complex components.
- Rotary tools: Remove excess support material and refine details.
You select the method based on your project's requirements. For example, vapor smoothing works well for liquid containers, while sanding suits display models. These finishing techniques enhance print quality and make your creations more professional.
Maintenance Tips
Regular maintenance keeps your 3d printer running smoothly and extends its lifespan.
Clean the nozzle, build plate, and fans to prevent blockages.
Lubricate moving parts and calibrate axes for accuracy.
Update firmware and slicing software to improve reliability.
You should inspect cables and lubricate linear rods as part of your routine. Maintaining your printer ensures consistent results and reduces downtime. These tips help you achieve better prints and protect your investment.
Troubleshooting for 3d Printing Beginners
Common Print Issues
You may encounter several print issues when you start with additive manufacturing. Understanding why these problems occur helps you achieve better results and avoid frustration. Most errors stem from incorrect settings, environmental factors, or material choices.
Lines on the side of your print often result from vibrations or unstable printer frames.
Warping happens when the print does not stick to the bed or cools unevenly.
Gaps in thin walls and poor bridging can appear if your extrusion settings do not match the filament requirements.
Small features may not print if your layer height is too large or the nozzle is too wide.
Tip: You can minimize warping by using adhesives on the build plate and keeping the printing chamber at a stable temperature. Heated beds and gradual cooling also help reduce thermal stress, especially for rapid prototyping.
Calibration Problems
Calibration plays a vital role in print quality. You need to check several factors to ensure your printer operates correctly.
- Issues with extrusion can cause pock marks on prints. Uneven filament flow often leads to surface defects.
- Bed leveling is crucial. Multiple checks improve adhesion and prevent failed prints.
- Under-extrusion may occur if the plastic extruder arm fails or if the nozzle is clogged.
- Calibrating E-steps ensures your printer delivers the correct amount of filament.
- Gaps between the nozzle and bowden tube can impede filament flow during long retractions.
Calibration helps your printer align print heads and interpret color information. When calibration fails, you may see dull images, color imbalances, or misaligned layers.
You should store filament properly to avoid moisture, clean the nozzle regularly, and match extrusion settings to your filament.
Software Errors
Software errors can disrupt your prototyping workflow. You might see inconsistent extrusion, dimensional accuracy issues, or poor surface quality above supports.
- Vibrations and ringing affect the appearance of your prints.
- Not extruding at the start or not sticking to the bed often signals a slicing error or incorrect temperature settings.
- Over-extrusion and under-extrusion can both result from software misconfiguration.
- Stringing or oozing occurs when retraction settings are not optimized.
You can resolve most software errors by updating your slicing software, checking model integrity, and adjusting print parameters. For 3d printing beginners, learning to identify and fix these issues is essential for successful additive manufacturing projects.
Safety Tips
Operating Safely
You must operate your 3d printer with care to protect yourself and your equipment. Manufacturers recommend several key safety guidelines that help you avoid unauthorized access and hardware vulnerabilities. The table below summarizes these recommendations and explains why each one matters:
|
Safety Guideline |
Description |
|---|---|
|
Tamper Resistance |
Restricts access with PIN codes and secure firmware updates to prevent misuse. |
|
Firewall Integration |
Limits access to authorized users, reducing the risk of hacking or data theft. |
|
Separation of Critical Functions |
Protects sensitive information by keeping process and product data separate. |
|
Deterministic Performance |
Stops operations during anomalies and provides error messages, keeping you informed and safe. |
|
Secure Firmware Updates |
Ensures updates are verified, maintaining printer integrity and reliability. |
|
Component Sourcing |
Uses high-quality parts from trusted suppliers, lowering the chance of hardware failure. |
|
Local Support |
Offers on-site help through partner vendors, resolving issues quickly and efficiently. |
You benefit from these features because they reduce risks and keep your printing environment secure. Always follow manufacturer instructions and update your printer's firmware regularly.
Handling Materials
You handle 3d printing materials with caution to prevent health hazards and equipment damage. The table below outlines recommended procedures and explains why each step is important:
|
Safety Measure |
Description |
|---|---|
|
Compliance with 3D Printer Policy |
Ensures you follow all safety requirements and avoid violations. |
|
Mandatory Training |
Prepares you to use equipment safely and wear proper personal protective equipment (PPE). |
|
Fire Safety Review |
Identifies combustible media and reviews locations for fire risks. |
|
Installation Guidelines |
Requires you to install printers according to manufacturer and safety codes. |
|
Emergency Preparedness |
Helps you locate fire extinguishers and access safety data sheets quickly. |
|
Ventilation Requirements |
Reduces exposure to harmful fumes by discussing needs with safety experts. |
|
Cooling Period |
Allows time for cooling and contaminant dissipation before handling prints. |
You protect yourself and others by following these procedures. Proper training and PPE reduce the risk of injury and exposure to chemicals.
Preventing Accidents
You prevent accidents by understanding common risks and taking proactive steps. The most frequent injuries during 3d printer operation include:
- Exposure to harmful chemicals, which can cause respiratory problems and skin irritation.
- Improper wiring, leading to fire and shock hazards.
- Entrapment or crushing injuries from moving parts and sharp edges.
- Noise pollution, which may result in hearing damage over time.
You lower these risks by using enclosures to capture chemical emissions and ensuring proper ventilation. Limit access to trained personnel and choose low-emission materials when possible. Maintain a safe distance from active printers and minimize exposure time. Wear PPE and complete comprehensive training on hazards and safety practices. Conduct risk assessments and install printers in well-ventilated areas. These safety tips help you create a safer workspace and protect your health.
You achieve success with a 3d printer by following essential steps: setup, model preparation, calibration, printing, and finishing. When you explore additive manufacturing, you unlock new possibilities in prototyping and creative projects. Ongoing learning and experimentation help you build skills and confidence.
|
Impact Area |
Description |
|---|---|
|
Enhanced Engagement |
You stay motivated by creating and manipulating real objects. |
|
Improved Understanding |
You grasp complex ideas by interacting with 3D models. |
|
Skill Development |
You strengthen problem-solving and creativity through hands-on projects. |
For more tips, you can use online courses, video tutorials, books, or local maker spaces. Stay curious and keep improving your results.
FAQ
Why should you choose PLA filament for your first 3d print?
PLA filament offers easy handling, low printing temperature, and minimal warping. You achieve reliable results with basic settings. Most beginners prefer PLA because it produces smooth prints and supports rapid prototyping. You avoid common issues found with advanced materials.
Why does bed leveling matter in 3d printing?
Bed leveling ensures the nozzle deposits filament evenly across the surface. You prevent poor adhesion, warping, and failed prints. Accurate bed leveling improves the first layer quality, which directly affects the strength and appearance of your finished object.
Why do you need slicing software before printing?
Slicing software translates your 3d model into printer instructions. You control layer height, print speed, and support structures. Without slicing, your printer cannot interpret the design file. You optimize print quality and reduce errors by adjusting slicing settings.
Why is regular maintenance important for your 3d printer?
Regular maintenance keeps your printer running smoothly and extends its lifespan. You avoid clogs, misalignment, and mechanical failures. Clean components and updated firmware improve reliability. You save time and material by preventing unexpected breakdowns.
Why should you monitor your print during the process?
Monitoring your print helps you catch issues early. You prevent filament jams, layer shifting, and surface defects. Real-time checks allow you to pause and adjust settings. You increase your success rate and reduce wasted material by staying alert.