



What is Raspberry Pi Portable Gaming Kits?
Raspberry Pi portable gaming kits are hardware bundles that transform the single-board Raspberry Pi computer into a handheld gaming device, typically featuring a screen, controls, battery, and case alongside the Pi board itself. These kits run emulation software like RetroPie, allowing users to play classic games from older consoles.
Types of Raspberry Pi Gaming Kits
The portable gaming market for Raspberry Pi splits into three main categories based on how much assembly work you're willing to do.
Pre-Built Complete Kits
Pre-built handhelds come fully assembled and cost between $119-$179, with everything ready to play out of the box. These typically include thousands of pre-loaded games, though they're generally the most expensive option due to assembly labor costs. The Retro CM3 and GP430 models exemplify this category, featuring 4.3-inch IPS screens and comfortable ergonomics optimized for PlayStation 1 and MAME games.

Semi-Assembled Kits (BYORP)
The PiBoy series popularized the "BYORP" (Bring Your Own Raspberry Pi) approach, where manufacturers provide a partially-assembled shell, screen, and controls, but users supply their own Pi board and SD card. The Retroflag GPI Case represents the sweet spot here at around $79, allowing users to drop in a Raspberry Pi Zero and assemble the device in under 30 minutes.
Experimental Pi's product line includes the PiBoy DMG (GameBoy-style), PiBoy XRS (horizontal with dual analog sticks), and PiBoy Mini, each supporting different Pi models and offering swappable color shells. The PiBoy Mini features a 3.5-inch LCD screen at 640x480 resolution in an 88x112x20mm shell, with four-way D-pad, four face buttons, shoulder buttons, and an amplified speaker.

DIY Build-From-Scratch
Budget-conscious builders can create functional portable consoles for as little as $20 using a Raspberry Pi Zero and cheap Chinese components, though this requires soldering skills and patience. More ambitious DIY builds cost $100-200 and involve selecting individual components including the Pi board, display, buttons, battery management system, and either 3D printing or purchasing a custom case.
Recent DIY projects have successfully used the Raspberry Pi Zero 2W as the main board, which provides enough power for NDS and PSX emulation with significantly faster boot times than the original Zero W.
Hardware Components
Understanding what goes into these kits helps clarify pricing and capabilities.
Raspberry Pi Models
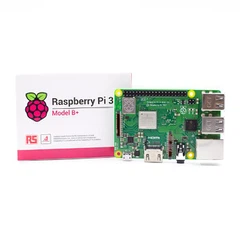
The Raspberry Pi 4 Model B remains popular for gaming kits due to its balance of power and availability, though builders can use any Pi model from the tiny Zero to the latest Pi 5. The Pi Zero 2 brought quad-core processing to the Zero form factor, making it viable for more demanding 90s-era games while maintaining the compact size ideal for portables.
CPU power matters more than RAM for game emulation, as every Raspberry Pi 4 uses the same processor regardless of whether it has 2GB, 4GB, or 8GB of memory. For retro gaming specifically, 2GB suffices for most emulation needs.
Display Options
Screen sizes range from 2.4 inches on ultra-compact builds to 4.3 inches on larger handhelds, with 3.5-inch 640x480 displays offering a practical middle ground that works well for classic games. High-end builds occasionally incorporate 1080p AMOLED screens, though these drain batteries faster and offer diminishing returns for pixel-art games designed for lower resolutions.
Power Management
The PiJuice battery HAT (Hardware Attached on Top) simplifies portable builds by providing integrated charging, power conversion, and GPIO passthrough in a single module. Budget alternatives include generic lithium-ion batteries from old phones paired with TP4056 charging modules, though these require more careful implementation to avoid over-current issues.
Modern builds typically use 4000mAh batteries and USB-C charging, with LED indicators showing charge status.
Input Controls
Most kits replicate classic controller layouts. The Super Nintendo button arrangement remains popular, offering enough inputs for games up through the 16-bit era. More advanced builds include dual analog sticks for N64 and PSX games, plus shoulder buttons and dedicated Start/Select/Menu buttons.

Software Ecosystem
RetroPie serves as the dominant software platform, providing a free and open-source emulation suite that transforms the Pi into a plug-and-play retro gaming system. The software includes EmulationStation as its frontend and supports dozens of emulator cores for different classic systems.
Software setup requires some technical knowledge, especially for newer Pi models where official images may need kernel updates to support all hardware features like WiFi and Bluetooth. Users must configure controls, add their own game files (ROMs), and adjust emulator settings for optimal performance.
Lakka offers an alternative to RetroPie with a different interface approach, though it doesn't yet support 8GB Pi boards.
Performance Capabilities
What can these devices actually run?
Raspberry Pi Zero-based handhelds handle 8-bit and 16-bit systems well (NES, SNES, Genesis) but struggle with more demanding platforms. Pi 4-powered devices can emulate Nintendo 64, PlayStation 1, and MAME arcade games smoothly, and premium Pi 5 builds even attempt Dreamcast emulation.
PlayStation 1 games work particularly well on 4.3-inch 800x480 displays, matching the visual style of that generation. PSP and Dreamcast remain hit-or-miss depending on specific games and Pi model.
Pricing Breakdown
The cost spectrum runs wide depending on your approach.
Complete pre-configured kits range from $79 for basic builds to $129 for Pi 5-based premium systems. The Vilros Pi 4 Complete Gaming Kit at $89 represents solid value for those wanting immediate playability.
DIY builders gain flexibility and cost savings but invest significant time and require technical skills for soldering, configuration, and troubleshooting. A Raspberry Pi 4 4GB board alone costs around $55-60, with complete self-sourced builds typically totaling $80-120 depending on component choices.
Don't forget accessories: a quality 32GB microSD card runs $12-18, USB controllers cost $15-30 for a pair, and proper cases with cooling range from $15-49.
Advantages and Limitations
These devices occupy a specific niche worth understanding.
Strengths
Raspberry Pi-powered handhelds often outperform similarly-priced Chinese emulation devices in terms of compatibility and frame rates, thanks to the Pi's stronger processor and active software community. The open-source nature means continuous software improvements and extensive troubleshooting resources.
The 26 GPIO pins allow hardware interfacing that extends beyond gaming, and the large Raspberry Pi community provides abundant tutorials and support. Users gain hands-on learning about Linux, programming, and hardware assembly.
Weaknesses
The Raspberry Pi lacks a dedicated GPU, relying on the CPU for graphics processing, which limits performance on more demanding emulators. MicroSD card storage offers slower read/write speeds than internal eMMC, potentially causing longer boot times and occasional lag.
Heat management poses challenges, particularly for the Pi 4, which can exceed 70°C during extended gaming sessions without proper cooling. Most quality kits address this with aluminum cases that passively dissipate heat, though active cooling fans remain necessary for overclocked builds.
Pre-built RetroPie handhelds cost significantly more than mass-produced alternatives because they're not manufactured at scale. Building your own or buying a DIY kit helps control costs but demands time and technical comfort.
Assembly Considerations
If you're going the DIY route, expect challenges.
Projects require experience with soldering, programming, and possibly 3D printing, and success isn't guaranteed on the first attempt. Starting with the simplest working system and adding features incrementally proves more successful than attempting a complete build all at once.
One builder's approach involved using the handheld incrementally-first just playing on a monitor with a keyboard, then adding the portable screen, then buttons, then battery-ensuring functionality at each stage. This gradual method lets you actually use the device while building it, rather than waiting months for a complete assembly.
Most kits take 2-3 hours to assemble if you have the right tools and follow instructions carefully. Software configuration often proves trickier than hardware assembly, particularly when using newer Pi models that need custom kernel builds for full hardware support.
Notable Products
A few standout options deserve mention.
The PiBoy Mini at $89.95 offers excellent value, providing an authentic retro gaming experience in a compact form factor. Users need to supply their own Raspberry Pi Zero or Zero 2W and microSD card with games.
The GamerCard takes minimalism to an extreme, sandwiching a Pi Zero 2W between PCB layers to create a 6.5mm thick, 105-gram device the size and shape of a gift card, shipping late 2025.
The PiGo from Tindie offers a no-soldering build experience where components click together, designed specifically for the Pi Zero and Zero 2.
Legal and Practical Notes
Kits don't include game files (ROMs) as manufacturers can't legally distribute copyrighted content. Users must source their own games through legal means.
These are projects, not off-the-shelf consoles-expect to tweak settings, install files, and troubleshoot issues. Complete kits eliminate guesswork through tested component combinations and warranty support, while DIY builds offer maximum customization at the cost of guaranteed compatibility.
Battery life varies widely based on Pi model, screen size, and which games you're running, but budget builds using cheap 1200mAh batteries typically provide around one hour of gameplay. Quality batteries in the 4000mAh range extend this to 3-4 hours for less demanding games.
Who Should Build One
These kits appeal to specific audiences. Retro gaming enthusiasts who value authenticity and customization find them rewarding. Parents looking for educational projects that teach kids about computers, programming, and electronics see value in the hands-on learning. Hobbyists who enjoy tinkering and building appreciate the flexibility.
However, if you want a turnkey gaming device with minimal setup, modern budget Android handhelds or dedicated emulation devices might serve you better. Purpose-built handhelds from companies like Retroid offer comparable or better specs with simpler software setup and better ergonomics.
The sweet spot for Raspberry Pi gaming kits lies in the intersection of nostalgia, learning, and customization. You're not just buying a product-you're engaging with a global maker community and gaining technical skills that extend far beyond gaming.
Whether you start with a complete kit, a semi-assembled shell, or source components individually, the journey of building your own portable gaming device connects you to computing history while creating something uniquely yours. Just temper expectations about performance, budget time for assembly and configuration, and prepare to learn through the inevitable troubleshooting process.