

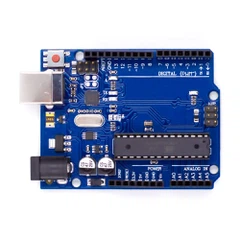
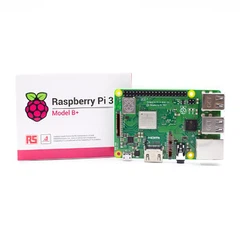


Need the WIFI function in your Arduino IoT projects? Look no further than Arduino WIFI - the technology that allows you to seamlessly connect your Arduino projects to the internet. You can monitor and control your devices remotely, gather data in real-time, and even create interactive applications. But where do you start? In this guide, we will walk you thourgh the steps of using Arduino UNO WIFI feature in your IoT projects. Get ready to create more interesting Arduino IoT project with the power of Arduino WIFI function.
What is Arduino WIFI and how does it work?
Arduino WIFI is one of Arduino features that enables you to connect your Arduino projects to the internet wirelessly. It utilizes the power of Wi-Fi networks to establish a reliable and fast connection between your Arduino board and other devices or applications. By leveraging the capabilities of Arduino WIFI, you can create IoT projects such as weather station and real time monitor.
To understand how Arduino WIFI works, let's delve into its components. The key element is the Arduino WIFI board, which is equipped with a built-in Wi-Fi module. This module enables the board to communicate with Wi-Fi networks and establish connections with other devices or online services. Additionally, the Arduino WIFI board also includes an array of input and output pins, allowing you to connect various sensors, actuators, and other components to your project.
The communication between the Arduino WIFI board and other devices or online services is facilitated through the use of protocols such as HTTP, MQTT, or WebSocket. These protocols enable data exchange, allowing you to send and receive information between your Arduino project and the online world. With Arduino WIFI, you can create projects that can send sensor data to cloud platforms, receive commands from web applications, or even interact with other IoT devices.
Arduino WIFI provides a powerful and flexible platform for building IoT projects. It combines the simplicity and versatility of the Arduino ecosystem with the connectivity and capabilities of Wi-Fi networks, making it an ideal choice for both beginners and experienced enthusiasts. Now that we have a basic understanding of Arduino WIFI, let's explore how to get started with this exciting technology.
Getting started with Arduino WIFI
Before diving into the world of Arduino WIFI, it's important to gather the necessary components. You will need an Arduino WIFI board, such as the Arduino MKR1000 or the ESP8266, which are popular choices for Wi-Fi-enabled Arduino projects. Additionally, you will also need a computer with the Arduino IDE installed, a USB cable for programming the Arduino board, and access to a Wi-Fi network.
Once you have all the required components, it's time to set up your Arduino WIFI board and prepare it for your IoT project. The first step is to connect your Arduino board to your computer using the USB cable. This will allow you to program the board and upload your code.
After connecting your Arduino board, you need to open the Arduino IDE and install the necessary libraries for Arduino WIFI. These libraries contain pre-written code that simplifies the process of establishing Wi-Fi connections and handling data exchange. The Arduino community has developed several libraries specifically for Arduino WIFI, such as the ArduinoWiFi library and the PubSubClient library, which are widely used and provide extensive functionality.
Once you have installed the required libraries, you can start coding your Arduino WIFI project. The Arduino IDE provides a user-friendly interface for writing and uploading code to your Arduino board. It uses a simplified version of the C++ programming language, making it accessible to beginners while still providing advanced features for experienced programmers.
When writing code for Arduino WIFI, you need to consider the specific requirements of your IoT project. This includes setting up Wi-Fi connections, handling data exchange, and implementing any additional functionality you may need. The Arduino libraries provide functions and examples that can help you get started quickly, allowing you to focus on the unique aspects of your project.
Setting up the Arduino WIFI board
Now that you have gathered the necessary components and installed the required libraries you need for your IoT projects, it's time to set up your Arduino WIFI board. The first step is to connect your Arduino board to your computer using the USB cable. This will allow you to program the board and upload your code.
Once your Arduino board is connected, open the Arduino IDE on your computer. In the IDE, select the correct board and port from the Tools menu. This ensures that the IDE can communicate with your Arduino board and upload your code successfully.
Next, you need to configure the Wi-Fi settings for your Arduino WIFI board. In the Arduino IDE, navigate to the Examples menu and select the Wi-Fi library. From the list of examples, choose the "WiFiWebServer" example. This example provides a basic web server that you can use to test your Wi-Fi connection.
In the code for the "WiFiWebServer" example, you will find a section where you need to enter your Wi-Fi network credentials, such as the network name (SSID) and password. Replace the placeholders with the correct information for your network.
Once you have entered your Wi-Fi network credentials, you can upload the code to your Arduino WIFI board. Click on the "Upload" button in the Arduino IDE, and the IDE will compile and transfer the code to your Arduino board. After the upload is complete, open the serial monitor in the Arduino IDE to view the IP address assigned to your Arduino board by the Wi-Fi network.
Connecting Arduino WIFI to your network
With your Arduino WIFI board set up, it's time to connect it to your Wi-Fi network. This step is crucial as it establishes the connection that allows your Arduino project to communicate with other devices or online services.
To connect your Arduino WIFI board to your network, you need to ensure that your Wi-Fi network is in range and accessible. Make sure that the network name (SSID) and password entered in the code match the credentials of your Wi-Fi network.
Once you have verified the network credentials, power up your Arduino board and wait for it to establish a connection with the Wi-Fi network. You can monitor the status of the connection by checking the serial monitor in the Arduino IDE. If the connection is successful, the serial monitor will display the IP address assigned to your Arduino board by the Wi-Fi network.
Once your Arduino board is connected to the Wi-Fi network, it's time to test the connection and ensure that it is working correctly. You can do this by running a simple test program on your Arduino board that sends a request to a web server and displays the response. By doing so, you can verify that your Arduino board can communicate with the online world via the Wi-Fi network.
Programming Arduino WIFI for your IOT project
Now that you have successfully set up and connected your Arduino WIFI board, it's time to dive into the exciting world of programming. By writing code for your Arduino WIFI project, you can unleash the full potential of your IoT project and make it come alive.
When programming Arduino WIFI, you need to consider the specific requirements of your IoT project. This includes defining the behavior of your project, handling data exchange, and implementing any additional functionality you may need. The Arduino libraries provide functions and examples that can help you get started quickly and simplify complex tasks.
To program your Arduino WIFI project, open the Arduino IDE and create a new sketch. You can use the built-in examples or start from scratch, depending on the complexity of your project. The Arduino IDE provides a user-friendly interface for writing code, with features such as syntax highlighting and auto-completion, making it easier to write and debug your code.
When writing code for Arduino WIFI, you need to leverage the functions and capabilities provided by the Arduino libraries. These libraries simplify common tasks, such as connecting to Wi-Fi networks, sending and receiving data, and interacting with other devices or online services. By using these libraries, you can focus on the unique aspects of your project, rather than reinventing the wheel.
Troubleshooting with Arduino WIFI
When you encounter WIFI connection problems with your Arduino, it's important to take a systematic approach to troubleshooting. Start by checking the physical connections between your Arduino board and the WIFI module. Ensure that all cables are securely attached and that there are no loose connections. Next, verify that the WIFI module is properly powered. Insufficient power can lead to unstable WIFI connections or no connection at all. If everything appears to be in order, it's time to check the configuration of your WIFI module. Make sure that you have correctly entered the SSID and password for your WIFI network. Incorrect configuration settings can prevent your Arduino from connecting to the internet. If all else fails, consider resetting your WIFI module to its default settings and starting the configuration process from scratch. Remember to consult the documentation for your specific Arduino board and WIFI module for detailed instructions on troubleshooting connection problems.
Conclusion
It might looks a bit overwhelming to start a IoT project with Arduino UNO wifi. But if you follows the guide and instruction, it is possible for a starter to build an IoT project.Now let's start building togehter.